

Education
How to set up a VPN on any device: 2026 setup guide

Learning how to set up a VPN is usually straightforward when you use a provider app. Manual VPN configuration takes longer because you need a server address, protocol, credentials, and sometimes a certificate. This guide separates those two methods, covers Windows, macOS, iPhone, Android, and routers, then shows how to check that traffic is using the connection you intended.
How to set up a VPN: the quick answer
For a personal VPN subscription, download the official app, sign in, approve the operating system's VPN request, and connect. That process may take only a few minutes, although account verification, updates, or device policy can add time. For work access or a manual profile, use the exact server, VPN type, sign-in method, and certificate details supplied by the network administrator or provider.
Do not invent missing values or select a protocol at random. A server address alone is not enough to create a working VPN profile.

First, choose the right VPN setup method
| Method | Best for | What you need | Main limitation |
|---|---|---|---|
| Provider app | Personal VPN subscriptions | Account and official app | Features depend on the provider and platform |
| Manual profile | Work, school, or a supported subscription | Server, VPN type, credentials, and possibly a certificate | Native clients may lack provider-specific features |
| Router client | Compatible home devices sharing one tunnel | Supported router and provider configuration | More complex troubleshooting and routing |
| Personal VPN server | Remote access to a network you control | Server administration, firewall rules, keys, and maintenance | This is a separate security project, not an app installation |
A commercial VPN app and a self-hosted VPN server solve different problems. The app sends traffic through the provider's infrastructure. A personal server commonly gives remote access to your home or business network, but it does not automatically provide the same location choices or operational support.
What you need before configuring a VPN
- A trusted source: use the provider's official website, Microsoft Store, Apple App Store, or Google Play. Google says Play Protect checks installed apps for potentially harmful behavior, but store availability is not a substitute for reviewing the publisher.
- The correct account: personal subscription credentials may differ from manual VPN credentials.
- Manual profile details: obtain the server address, VPN type, sign-in method, username, password, shared secret, or certificate as applicable.
- A recovery path: keep the original network settings and know how to remove the profile if the connection fails.
If you are still deciding whether this tool fits your needs, read what a VPN does and does not protect. Free plans also deserve a separate check, because limits and business models vary from one provider to the next.
Set up a VPN with a provider app
- Download the official app. Confirm the publisher and domain before installing.
- Sign in. Complete any email or multifactor verification requested by the provider.
- Approve the VPN request. Windows, macOS, iOS, and Android must allow the app to create or control a VPN configuration.
- Review the settings. Check the selected protocol, automatic connection behavior, and kill switch options. Defaults differ by provider, app version, and operating system.
- Connect to a nearby server. A nearby endpoint is a sensible starting point for general browsing because distance can affect latency.
Do not assume every application is included in the tunnel. Split tunneling, per-app rules, browser extensions, and local-network permissions can change the route. The connection screen confirms that the app believes it is connected, but independent IP and DNS checks provide stronger evidence.
How to configure a VPN manually
The steps below show how to set up a VPN manually when an employer, school, or VPN service gives you a profile or connection values. Manual configuration is not a way to obtain a VPN without a server.
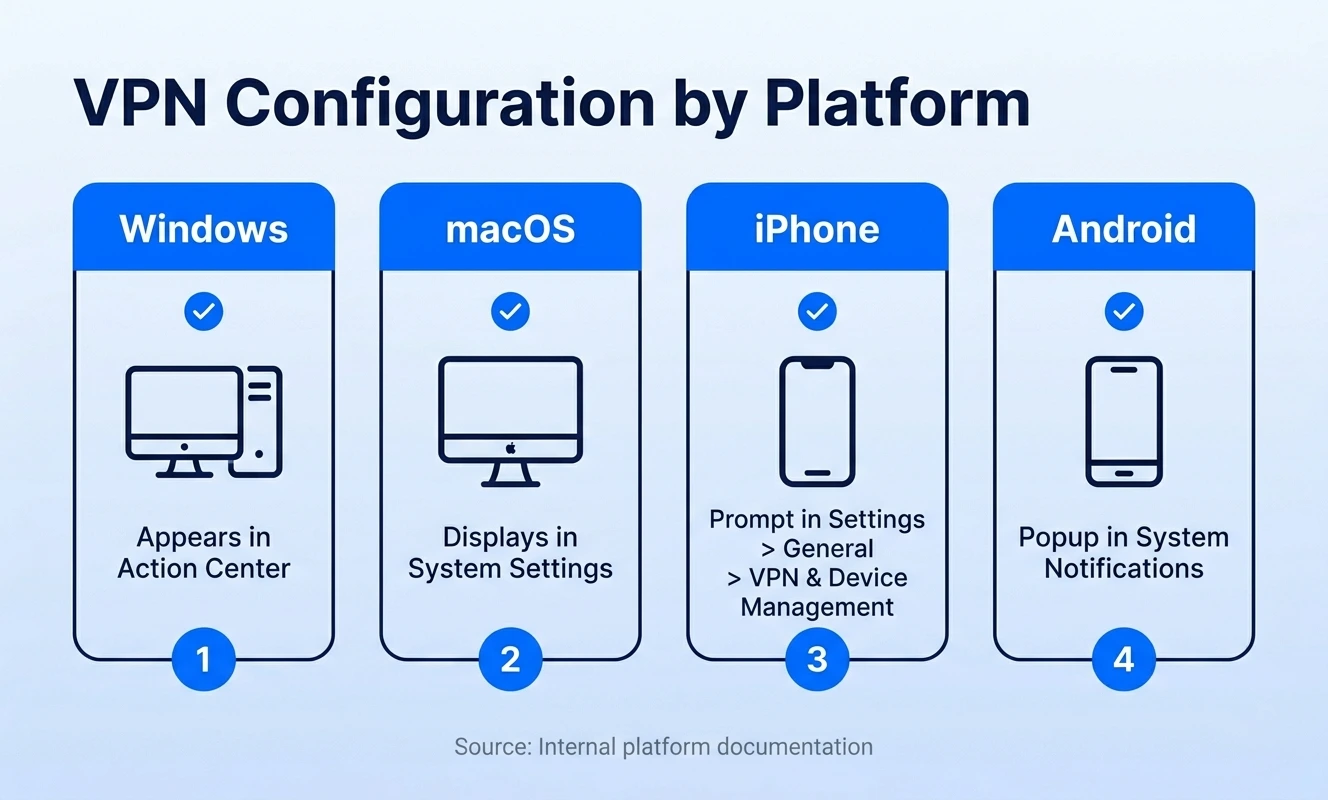
Windows 11
- Open Settings, then Network & internet, VPN, and Add VPN.
- Select Windows (built-in) as the VPN provider.
- Enter a recognizable connection name and the supplied server name or address.
- Select the exact VPN type and sign-in method supplied by the administrator or service.
- Save the profile, select it from the VPN page, and connect.
Microsoft notes that work profiles may use a username and password, one-time password, certificate, or smart card. Its current Windows VPN instructions also explain how to edit advanced profile details.
macOS
- Open System Settings, select Network, and choose Add VPN Configuration from the action menu.
- Select the VPN type supplied to you.
- Enter the display name, server address, account name, and required authentication settings.
- Create the service and connect from VPN settings or the VPN status menu.
Apple's macOS setup documentation lists IKEv2, Cisco IPSec, and L2TP over IPSec options. Available fields vary by VPN type.
iPhone and iPad
A consumer app normally installs and manages its configuration after you approve the system prompt. Work and school configurations may arrive through a managed profile. Apple's VPN On Demand is not simply a universal consumer toggle: Apple documents it as rules in a configuration profile using an authentication method that does not require user interaction. Follow the vendor or administrator's instructions rather than importing an unknown profile.
Android
Open Settings, Network & internet, then VPN. Names vary by manufacturer, so search Settings for VPN if the menu differs. Add the values supplied by the administrator or use the provider app. Google's Android VPN guide says the Always-on option may not appear when the VPN was configured through an app. Do not promise that every Android device exposes identical controls.
Set up a VPN on a compatible router
A router VPN client can route supported home-network traffic through one tunnel, including traffic from devices that cannot run a VPN app. It does not guarantee that every packet follows that route. Guest networks, IPv6, policy-based routing, local services, and devices using another connection can behave differently. If you are deciding whether router-wide protection is justified, start with our home VPN decision guide before changing network settings.
- Confirm that the exact router model supports VPN client mode and the protocol supplied by the provider.
- Back up the router configuration before changing it.
- Download configuration files only from the provider or network administrator.
- Import the profile, enter the required credentials or keys, and apply the route.
- Test both IPv4 and IPv6 behavior from a connected device.
Do not flash third-party firmware solely because a generic tutorial names it. A failed or incompatible firmware change can disable the router. Use the router manufacturer's documentation and keep a recovery method available.
How to confirm the VPN is working
- Record the public IP address before connecting, then compare it after connection.
- Run a DNS leak check and compare the reported resolvers with the expected VPN or configured DNS service.
- Check IPv6 separately if your connection and device support it.
- Use the app's route or connection details to confirm the intended server and protocol.
- Test the kill switch only in a controlled session where a brief loss of connectivity will not interrupt work or a transaction.
A changed IP address shows that at least the tested web request used a different public endpoint. It does not prove that every application, DNS request, or local connection follows the same route. Use our complete guide on how to test a VPN connection for IP, DNS, IPv6, and kill switch checks.
Common VPN setup problems
| Symptom | Likely check | Safe next step |
|---|---|---|
| Authentication failed | Wrong account type, expired password, missing certificate | Confirm the supplied credentials and device time |
| No connection | Server, VPN type, firewall, or network restriction | Compare every field with the official profile and try another trusted network |
| Connected but no internet | DNS, route, kill switch, or captive portal | Disconnect, complete the portal if applicable, then reconnect |
| Unexpected location | Wrong endpoint or app route | Confirm the selected server and public IP |
| One app bypasses the VPN | Split tunneling or per-app configuration | Review the app-routing list and reconnect |
Windows users can continue with our Windows 11 VPN connection fixes. If the tunnel connects but performance is poor, diagnose the cause with VPN speed troubleshooting before changing security settings.
VPN setup FAQ
Bottom line
For most personal subscriptions, the official provider app is the correct way to set up a VPN because it manages protocols, updates, and platform-specific features in one place. Manual configuration is appropriate when a trusted administrator or provider supplies every required value. Router and self-hosted setups demand more care and should not be treated as shortcuts.
After connecting, verify the public IP, DNS route, IPv6 behavior, and any split-tunneling rules that matter to your use case. A connected badge is useful, but measured routing is better evidence. Our walkthrough on how to test if your VPN is working sets out each of those checks in order.
Official setup references
Updated: July 26, 2026 · Author: Simon Phillips · Official platform documentation checked July 2026.
